
How to Make Herb-Infused Oil for Botanical Skincare and Salves
This article contains affiliate links. Please read our full disclosure page for details.
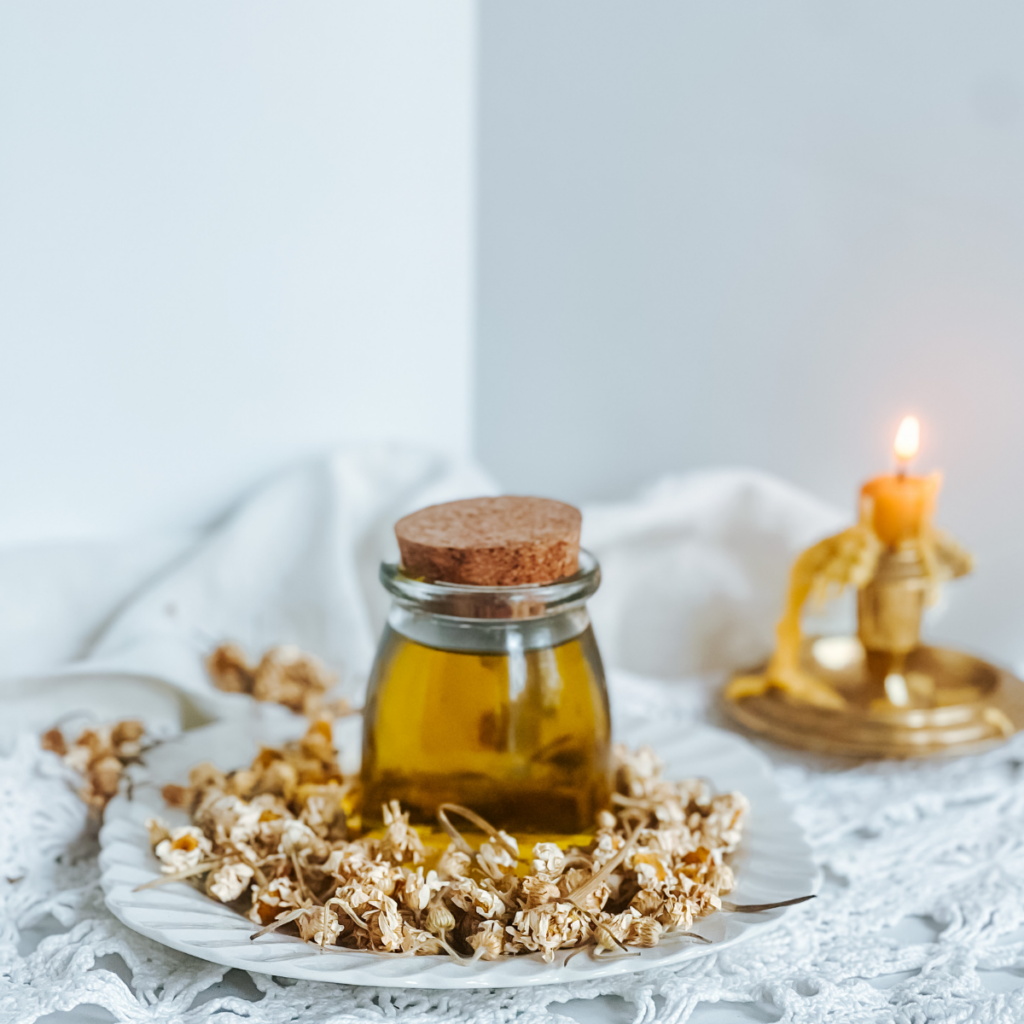
Herb-infused oil is one of the foundational ingredients in botanical body care. By steeping completely dried herbs in a carrier oil, you can create a beautifully colored and naturally aromatic oil to use in salves, balms, body oils, lip products, and other handmade projects.

I still remember straining my first jar of golden calendula oil—the scent earthy and warm, and rubbing a few drops into my hands felt like connecting to generations who healed with simple plant preparations. Making herb-infused oil for botanical skincare has become one of my favorite rituals since: a way to slow down, honor the herbs I grow and gather, and craft something both beautiful and useful. Whether it’s lavender for relaxation, peppermint for sore muscles, or rosemary for focus, each jar is a small act of self-care, and the starting point for salves, balms, and other botanical staples.
What is an Herb-Infused Oil?
An herb-infused oil is a carrier oil, such as olive, sunflower, or sweet almond oil, that has been steeped with dried herbs or flowers. Over time, the oil takes on some of the plant’s oil-soluble compounds, along with its color and subtle aroma. The process is similar to making tea, but instead of steeping herbs in water for a few minutes, the dried botanicals infuse slowly in oil over several days or weeks. The finished oil can be used on its own as a body or massage oil, but it also serves as a foundational ingredient in salves, balms, lotion bars, sugar scrubs, and other botanical body-care projects.
What Can you Make with Herb-Infused Oils?
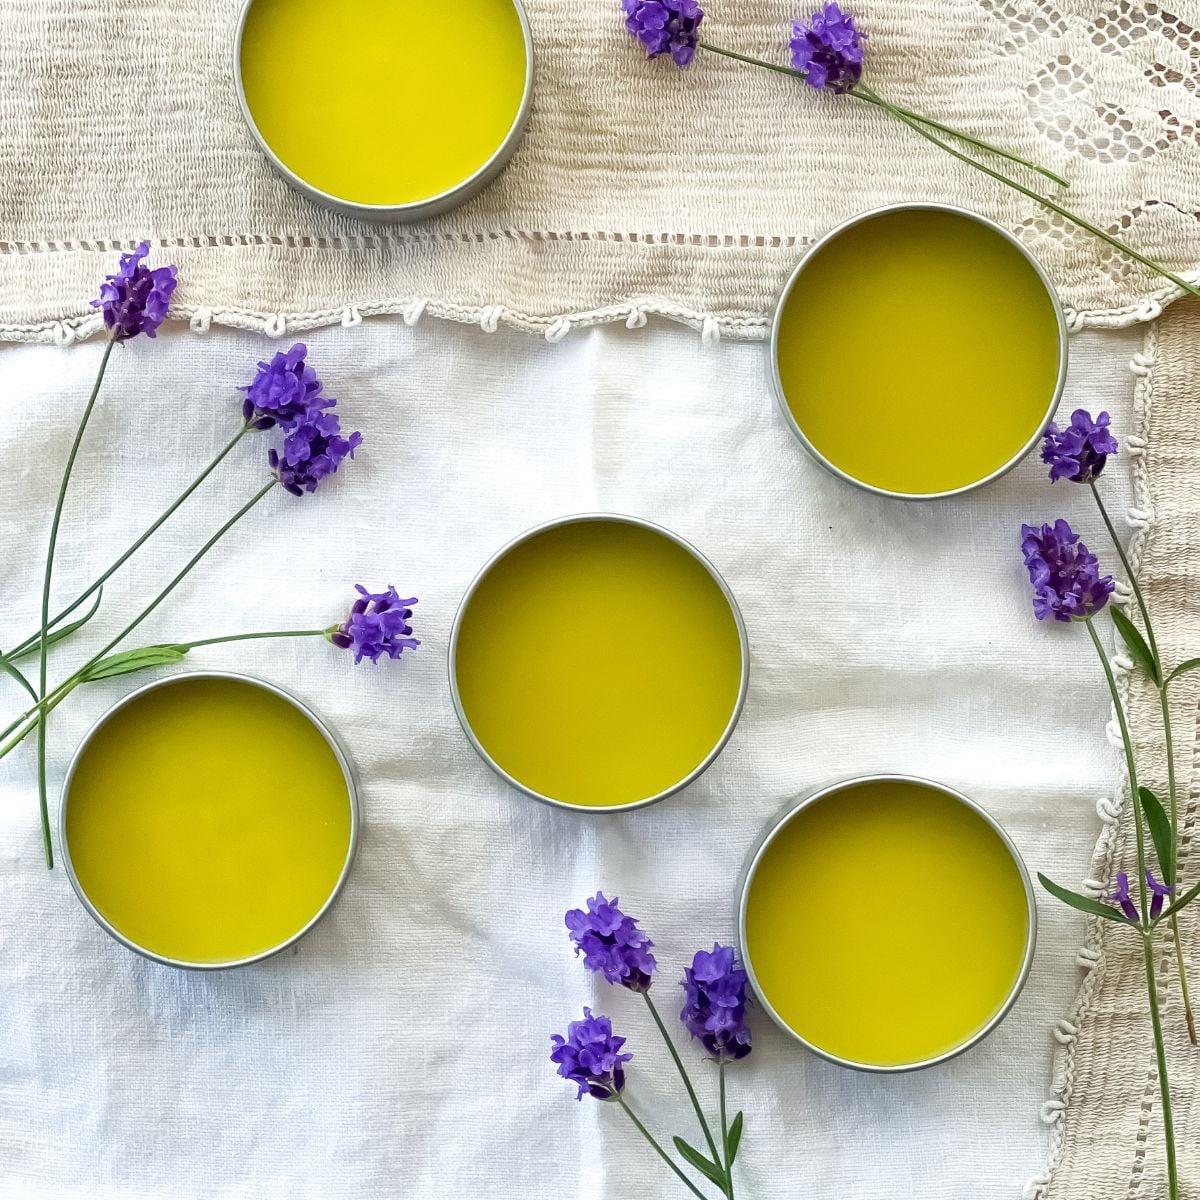
Once your herb-infused oil is ready, you can use it on its own as a body or massage oil or transform it into a variety of botanical body-care products. Infused oils form the foundation of handmade salves, balms, lip oils, lotion bars, body butters, sugar scrubs, and other simple skincare projects. The carrier oil you choose influences the texture and feel of the finished product, while the infused botanical contributes its own subtle color, aroma, and character.
If you’re new to botanical making, begin with my calendula-infused oil recipe to practice the basic infusion method. Then explore how infused oils can be transformed into finished products such as calendula salve, whipped body butter, and hydrating lip oil.

Important Distinction: Topical Versus Culinary Oils
This tutorial is intended for herb-infused oils used in topical botanical projects such as salves, balms, body oils, and lotion bars. Although infused oils can also be used in cooking, culinary oils require separate food-safety precautions—especially when fresh herbs, garlic, or other moisture-containing ingredients are involved. Do not assume that an oil prepared for body care is suitable for eating. For culinary use, choose food-grade ingredients and follow a tested recipe from a trusted food-safety source.
Choosing the Best Herbs to Use for Infused Oils for Botanical Products
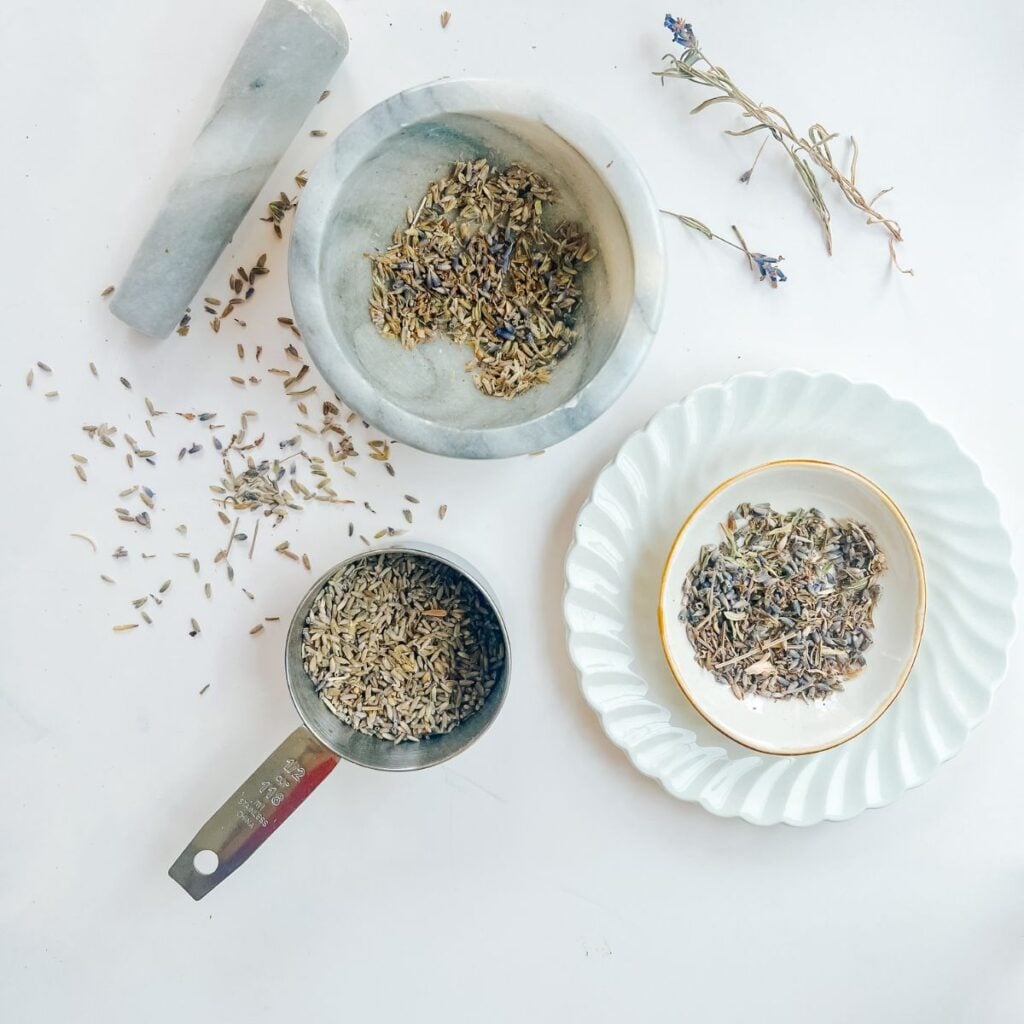
For beginner-friendly oil infusions, choose completely dried herbs or flowers from a reliable source. Calendula, lavender, rose, mugwort, rosemary, and chamomile are all lovely botanicals to explore, each contributing its own color, aroma, and character to the finished oil. Avoid using plant material that feels damp, looks discolored, or smells musty. Coarsely crumble larger leaves and flowers before adding them to the jar, but do not grind them into a fine powder, which can be difficult to strain from the finished infusion. Find the best herbal grinder to fit your needs.
- Calendula
- Lavender
- Rose
- Mugwort
- Rosemary
- Chamomile
If you want to know more about what herbs best help specific ailments, check out the best herbs to plant in a medicinal herb garden.

Choosing the Best Carrier Oils to Use for Infused Oils
The best carrier oil depends on how you plan to use the finished infusion. Olive oil creates a rich, substantial base that works especially well in salves and balms, while sunflower and sweet almond oils have a lighter feel suited to body and massage oils. Jojoba is a lightweight, oxidatively stable option for smaller facial or body-care preparations. Whichever oil you choose, begin with a fresh, good-quality product, check its best-by date, and select an oil whose natural texture and aroma you enjoy.
Below, you will find twelve different kinds of oils listed with their comedogenic rating, benefits, and moisturizing abilities. Additionally, those that can be consumed internally are indicated.
The comedogenic scale:
- 0: Non-comedogenic and will not clog pores.
- 1: Very low comedogenic (very unlikely to clog pores)
- 2: Moderately low comedogenic (May clog pores for some, but unlikely for most)
- 3: Moderately comedogenic (More likely to clog acne/oily skin types)
- 4: Fairly high comedogenic (Risk of clogging pores for almost all skin types).
- 5. High comedogenic (very high risk of clogging pores of all skin types)
Aragon Oil: Comedogenic rating of 0, there are both edible and non-edible versions of Aragon oil. It is also known as Morrocan oil and is a frequent ingredient in conventional skincare and hair care products. It is known for its hydrating properties and its proven record of assisting in healing damaged skin.
Avocado Oil: Comedogenic rating of 3 and is edible with a high heat temperature. Avocado oil is thick and deeply hydrating. It is best used on the body but can provide high-intensity moisturization for dry skin. It is thought to help with reducing the appearance of scars.
Castor Oil: Comedogenic rating of 1, not recommended as edible oil. Antimicrobial and anti-inflammatory castor oil is beneficial for those who suffer from acne. It contains high levels of triglycerides that assist in maintaining the moisture and hydration of the skin, which can benefit those suffering from dry skin.
Extra-Virgin Olive Oil (EVOO): Comedogenic rating of 2, edible oil, a highly moisturizing oil that absorbs well into the skin. It’s a heavier oil and may cause breakouts in those susceptible to acne. EVOO contains the antioxidant hydroxytyrosol, which is not found in other carrier oils. This antioxidant protects the skin from free radicals and is thought to help maintain the skin’s elasticity.
Grapeseed Oil: Comedogenic rating of 1, edible oil, a very light-weight and “dry-feeling” oil. It absorbs well into the skin but is less moisturizing than other oils. It’s known to be anti-inflammatory and can be a helpful oil for those susceptible to acne.
Jojoba Oil: Comedogenic rating of 2, non-edible oil, Absorbs easily into the skin. Its fatty acid structure is closely related to skin structure, making it a great choice for most skin types. Even with its low comedogenic rating, Jojoba oil is still a highly moisturizing oil. It’s a good choice for those with oily complexions.
Safflower Oil: Comedogenic rating of 0, and it is edible at both high and low temperatures. It is a great oil choice for those with combination skin that is both dry in parts and oily in other parts. Its lightweight and moisturizing qualities heal the skin and can balance the natural oils in the skin while unclogging the pores to release trapped oil and dirt. It is closely related to ragweed, and those who are sensitive to the ragweed family should avoid using Safflower oil.
Sunflower Oil: Comedogenic rating of 0, and it is edible! Sunflower oil contains high levels of vitamin E, which can help to repair damaged skin. It is a beneficial oil for those whose skin tends to be greasier.
Sweet Almond Oil: Comedogenic rating of 2, edible oil that is best consumed raw. Often used to reduce the appearance of scars or stretch marks. Sweet Almond Oil is a hydrating oil with a silky smooth finish. It absorbs well into the skin and can be used for deep moisturization of the hair.
You can also combine oils to create a custom oil blend depending on your intended use. Add a few drops of vitamin E oil for additional sun damage repair or rosehip seed oil for an extra boost of Vitamin C for additional brightening and clarifying.

How to Use Your Herb-Infused Oils
Infusions are easy to use as body oils or in salves. Here are a few situations in which your infused oils can be beneficial:
- In an herbal salve: Lavender, Mugwort, Calendula
- At the ends of hair, in order to promote growth and health, you might like our Rose Petal Infused Oil for Hair and Body
- As a relaxing massage oil
- As a lip balm or lip oil
How to Make An Herb-Infused Oil

Prepare The Herbs For Oil
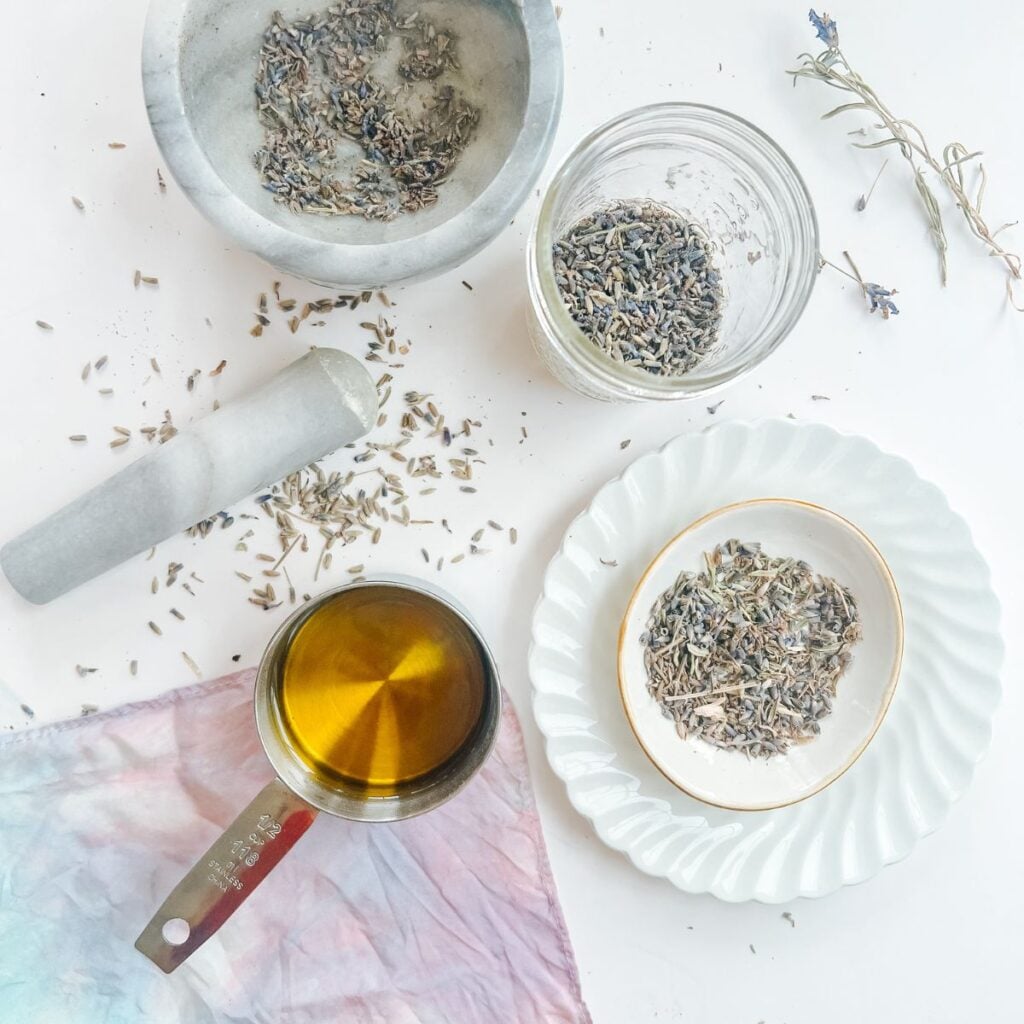
- Measure the dried botanicals.
- Measure one cup of completely dried herbs or flowers. Make sure the plant material shows no signs of moisture, discoloration, or mustiness. Coarsely break up the herbs.
- Use clean, dry hands, kitchen scissors, or a mortar and pestle to coarsely crumble or chop larger leaves and flowers. The smaller pieces create more surface area for the oil, but avoid grinding the herbs into a fine powder, which can be difficult to strain and may leave sediment in the finished oil. Add the herbs to a dry jar.
- Transfer the prepared herbs to a clean, completely dry, heat-safe glass jar. Make sure your hands, jar, and utensils are dry, as introducing water can shorten the infusion’s shelf life and increase the risk of spoilage. Cover the herbs with oil.
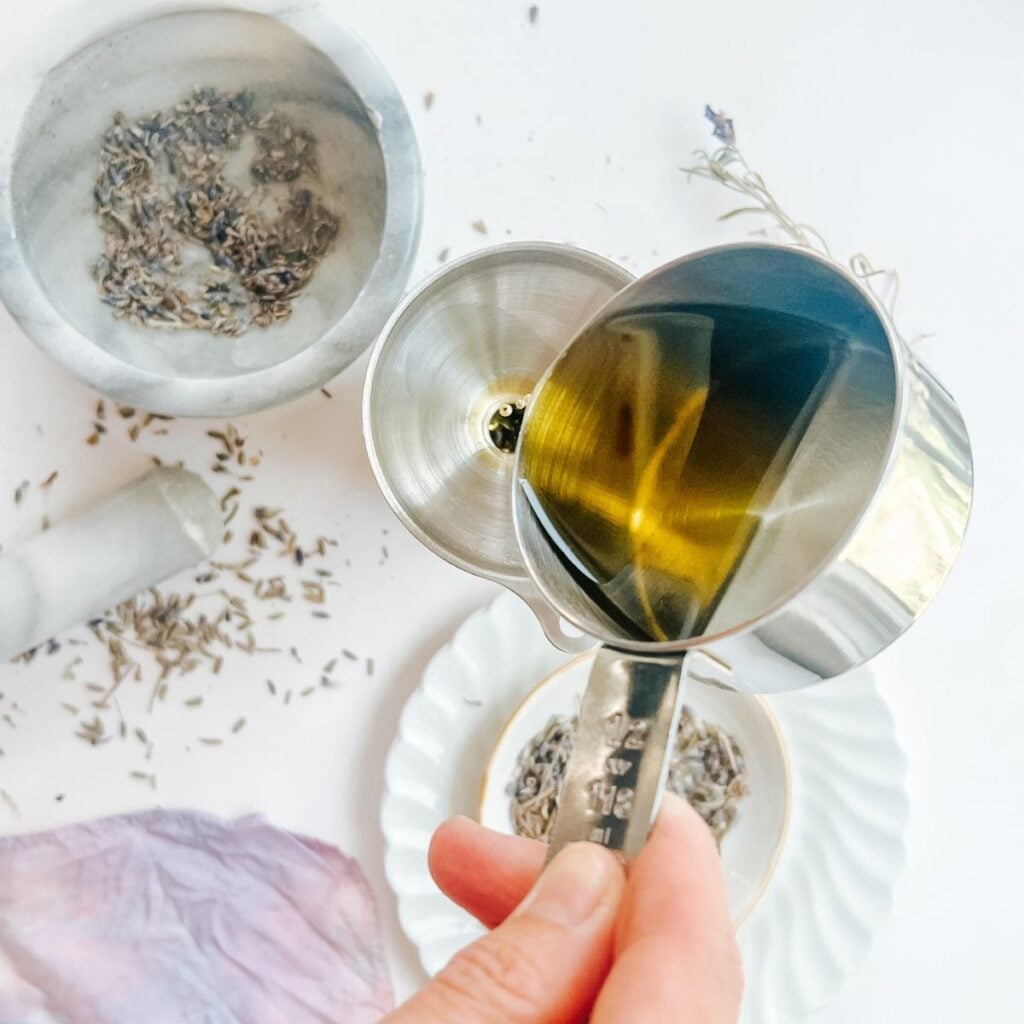
- Slowly pour your chosen carrier oil over the plant material until the herbs are completely submerged and the oil rests approximately one inch above them. The exact amount of oil needed will vary depending on the density and absorbency of the botanical. Release trapped air.
- Stir the mixture gently with a clean, dry spoon, pressing the herbs beneath the surface and releasing any trapped air bubbles. Let the mixture settle.
- Allow the jar to rest for 5–10 minutes. The dried herbs may absorb some of the oil, causing the level to drop. Add more oil as needed so the plant material remains completely covered. Lightweight leaves and flowers may float at first; check the jar again before beginning the infusion and top it with additional oil if necessary.
How to Make Herb-Infused Oils: Solar Warmed Folk Method
Tools you’ll need
The following list contains affiliate links.
Step-by-Step Instructions to Make Herb-Infused Botanical Oil
- Make sure the jar, lid, utensils, and your hands are completely dry. Moisture can encourage spoilage. Add the dried botanical. Loosely fill the jar about halfway to two-thirds full with completely dried herbs or flowers. Coarsely crumble larger pieces, but avoid grinding them into a powder because finely ground herbs are difficult to strain.
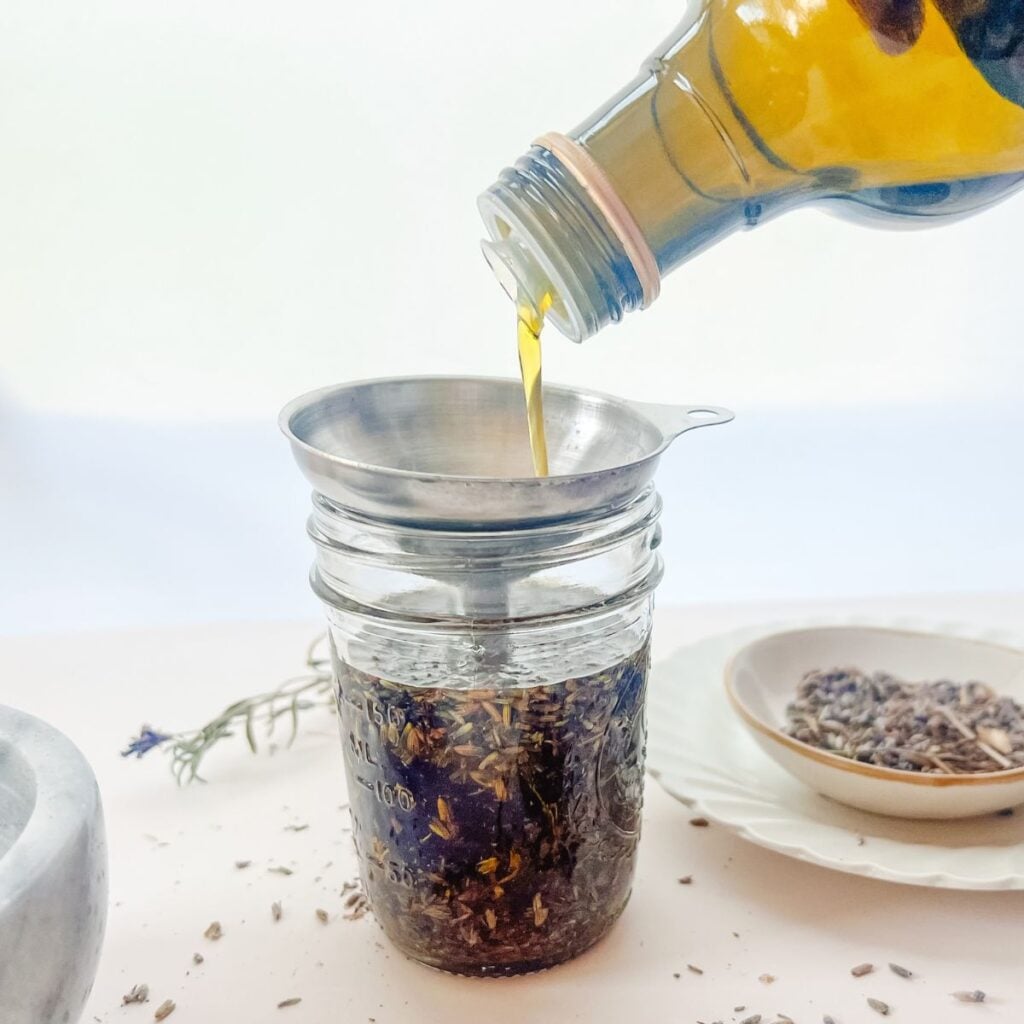
2. Slowly pour the carrier oil over the herbs. Continue pouring until the plant material is completely covered, with approximately one inch of oil above it.
3. Stir gently with a clean, dry spoon or slide the utensil around the inside of the jar. Add more oil if the level drops after the air bubbles escape. Close the lid tightly. Label the jar with the botanical, carrier oil, and date the infusion was started.
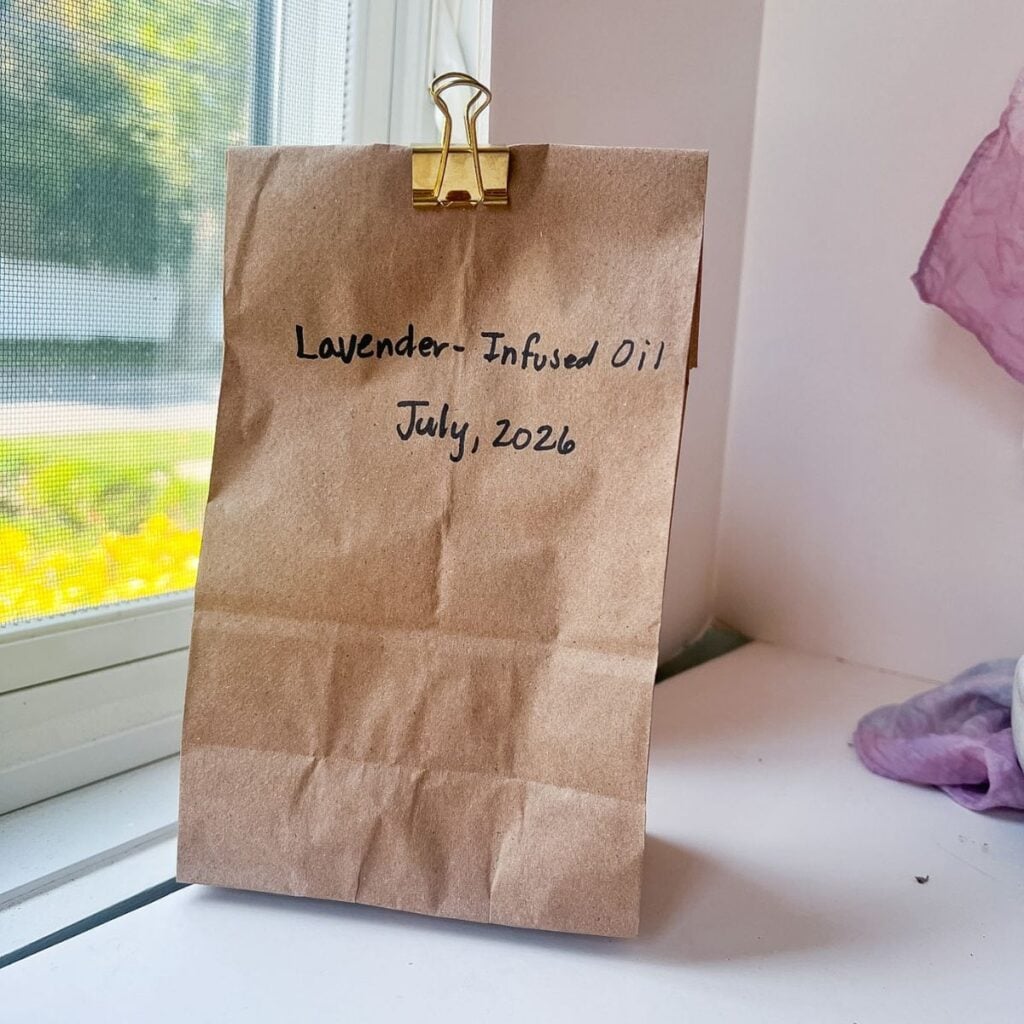
4. Place the jar inside a small paper bag or wrap it in a cloth. This allows the infusion to benefit from the sun’s gentle warmth while limiting the oil’s exposure to light, which can accelerate oxidation. Place it in a warm, sunny location. Set the protected jar on a sunny windowsill or another spot warmed by the sun. Avoid locations that become extremely hot, such as a closed car or unventilated greenhouse.
5. Turn or gently shake the jar once each day to redistribute the herbs. Check that all the plant material remains coated and covered with oil. Let the herbs steep for approximately two to four weeks. Check the oil regularly for changes in color and aroma, as well as any signs of moisture, mold, bubbling, or an unpleasant smell.
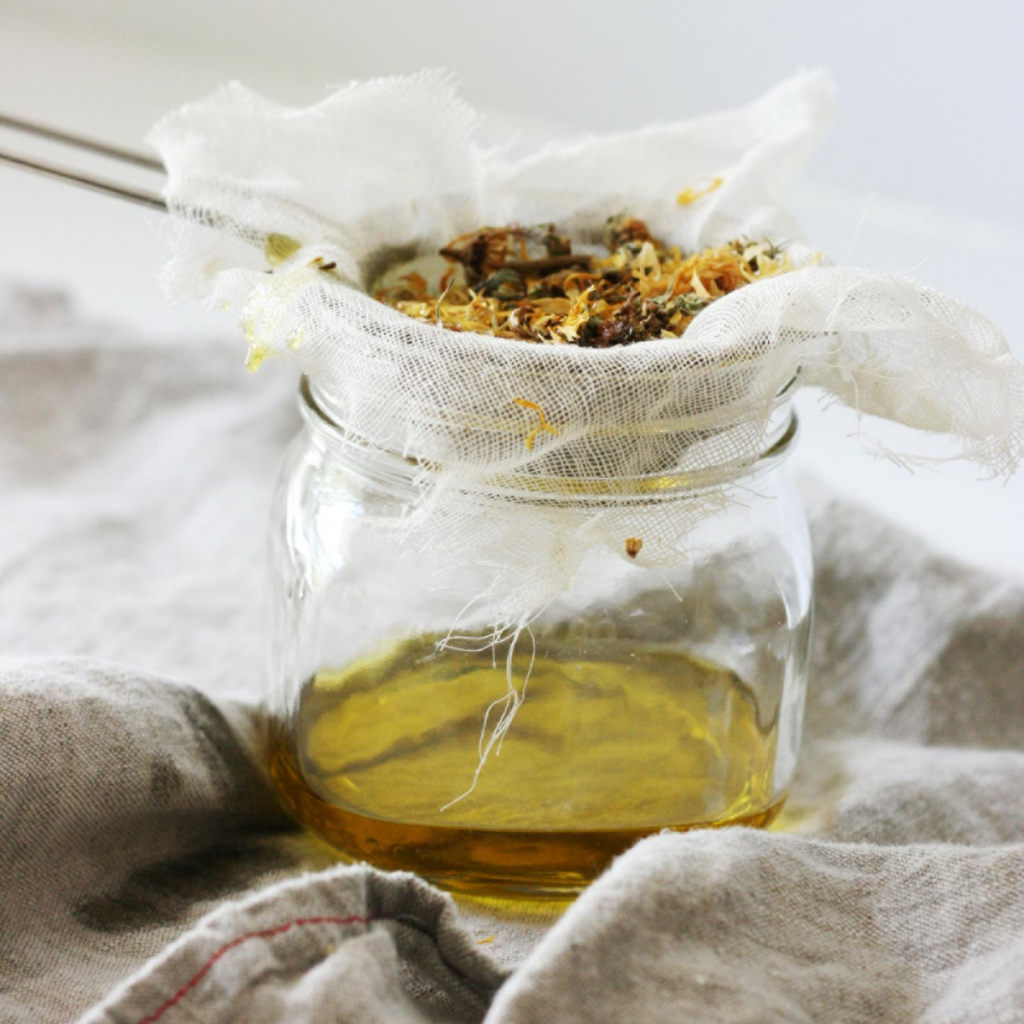
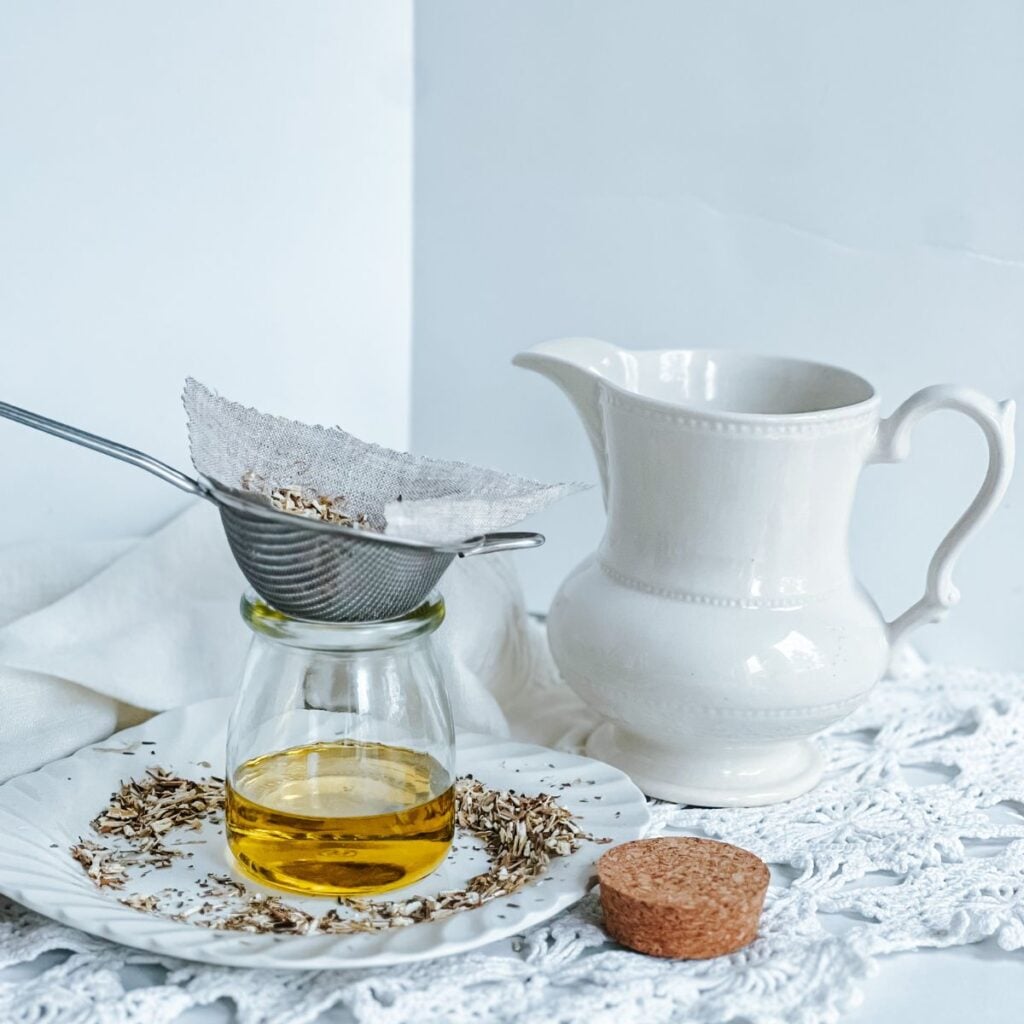
6. Pour the oil through a fine-mesh strainer lined with cheesecloth or muslin into a clean, completely dry container. Gently press the cloth to recover the remaining oil. Filter it a second time if it contains fine sediment.

7. Transfer the strained oil to a clean, dry bottle and label it with the botanical, carrier oil, and date strained.
8. Keep the finished oil tightly closed in a cool, dark place. Use the carrier oil’s original best-by date as the outer limit, and discard the infusion if it develops mold, visible moisture, unusual bubbling, or a stale, paint-like, waxy, or crayon-like odor.
How to Make a Quick Heat-Infused Herbal Oil Using a Double Boiler
Tools you’ll need
The following list contains affiliate links.
Step-by-Step Instructions to Make Herb-Infused Botanical Oil
- Make sure the double boiler, utensils, strainer, and storage bottle are clean and completely dry. Place completely dried, coarsely crumbled herbs or flowers in the top portion of the double boiler.
2. Pour your chosen carrier oil over the botanicals until they are completely submerged. Use enough oil to cover the plant material by approximately one inch. Add a few inches of water to the lower saucepan. Set the upper pan or heat-safe bowl in place, making sure its bottom does not touch the water.
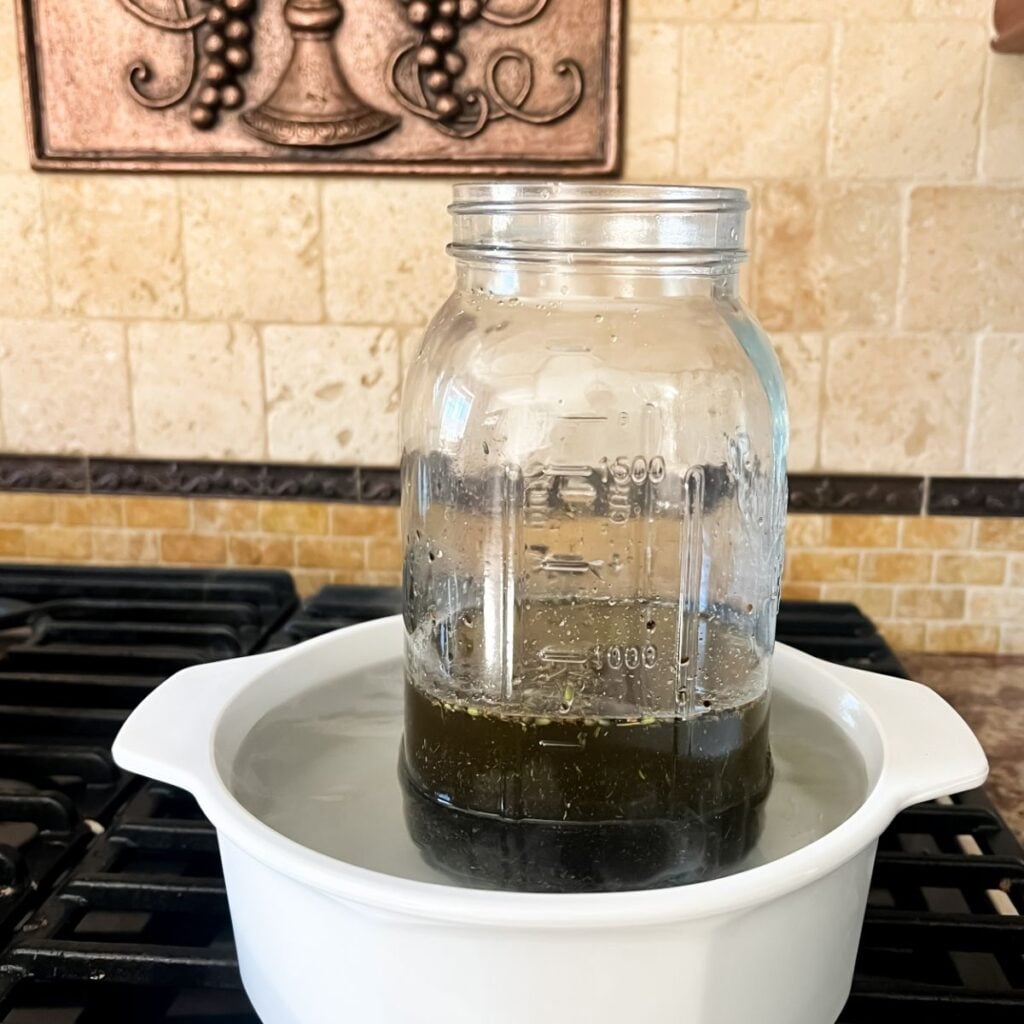
3. Place the double boiler over low heat. Keep the water at a gentle simmer, never a rolling boil, and do not allow the oil itself to simmer or smoke. Warm the herbs and oil for approximately 2-4 hours, stirring occasionally with a clean, dry utensil. The oil should remain gently warm throughout the process. Turn off the burner and allow the infusion to cool until it is warm but comfortable to handle.
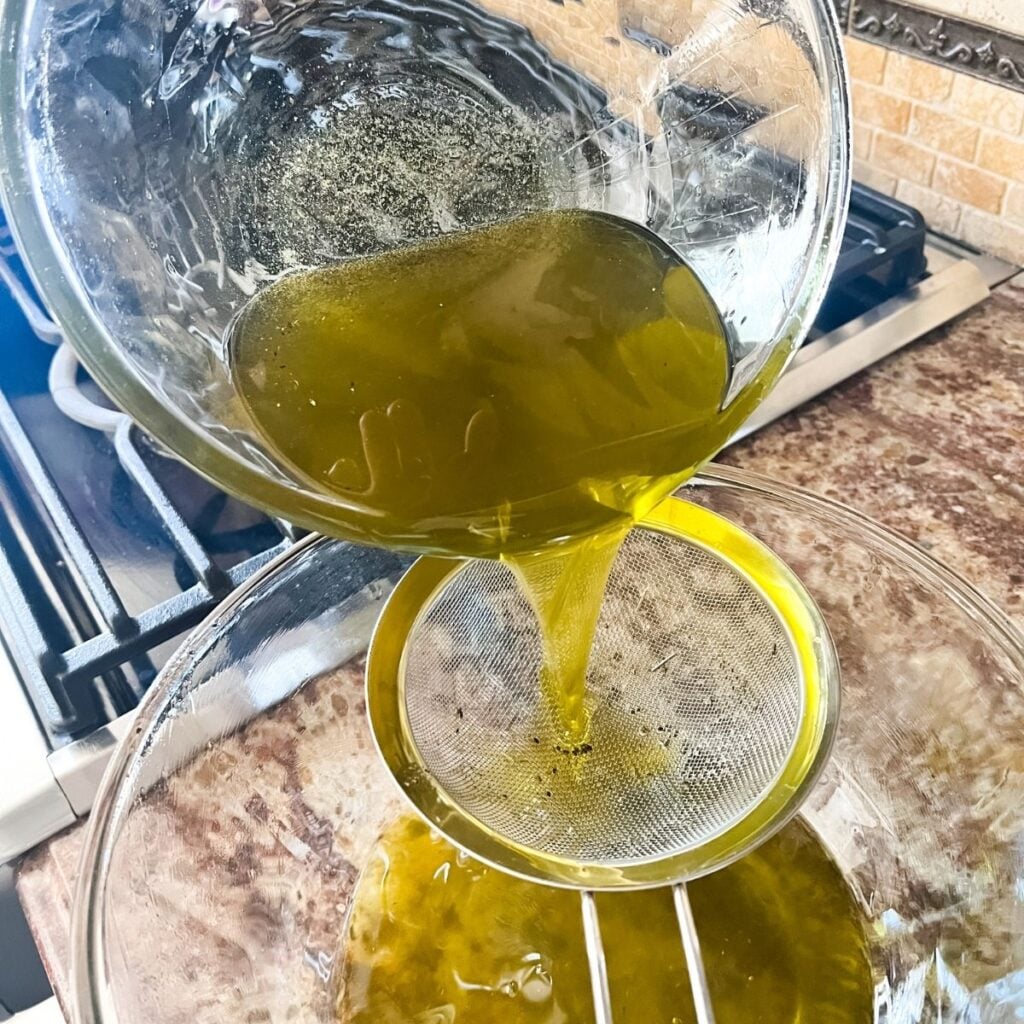
4. Pour the infusion through a fine-mesh strainer lined with cheesecloth, muslin, or a reusable filtering cloth. Gently press the herbs to extract the remaining oil. If the oil contains fine particles, let it settle and strain it a second time before bottling.
5. Transfer the strained oil into a clean, completely dry bottle. Label it with the botanical, carrier oil, and date made.
6. Keep the finished oil tightly closed in a cool, dark place. Discard it if you notice mold, moisture, bubbling, or a stale, paint-like, waxy, or crayon-like odor.

Saftey Considerations
- A few simple precautions will help you prepare herb-infused oils safely and prevent spoilage.
- Use completely dried herbs. Fresh plant material contains moisture, which can encourage mold and microbial growth. For this beginner-friendly method, always choose fully dried herbs and work with clean, completely dry tools and containers.
- Patch-test before use. Natural ingredients can still cause skin irritation or allergic reactions. Apply a small amount of the finished oil to the inside of your wrist or elbow and wait 24 hours before using it more broadly. Discontinue use if irritation occurs.
- Consider who will use the oil. Some herbs and essential oils may not be appropriate during pregnancy, while nursing, for young children, or for people with certain health conditions or allergies. Research each ingredient using a reliable source and consult a qualified healthcare professional when needed. Remember that an essential oil has different safety and dilution requirements from an herb-infused carrier oil.

Herbal Infused Oil Troubleshooting
FAQ’s
Can I use fresh herbs?
For this beginner body-care method, use completely dried herbs because fresh plant material introduces moisture into the oil
Does the jar need to sit in the sunlight?
No; a gently warm location away from direct light helps protect the carrier oil from unnecessary light and heat exposure. Or use the heat-infusing process.
How long should the herbs infuse?
A slow infusion generally takes about four to six weeks, although the botanical and conditions can influence the result. A heat-infusion takes 3-5 hours.
Can I combine several herbs
Yes, but beginning with one botanical makes it easier to observe what that particular plant contributes.
Try Making More!
More Posts That Use Infused Herbal Oils

Show Me What You Made!
I’d love to see your herb-infused oil! Share a photo on Instagram and tag @a.farm.to.keep or use #afkmakes so I can celebrate your creativity and see which botanical and carrier oil you chose.
Herb-infused oils were among the first botanical preparations I learned to make, and I’m still delighted by the simple transformation of dried plants and oil into a beautiful, versatile ingredient. I hope this guide gives you the confidence to make your own infusion and experiment with calendula, lavender, mugwort, rosemary, and other botanicals as your handmade collection grows.
Happy making,
Julia
Pin For Later

Julia Linsteadt
Julia Linsteadt is a botanical maker and craft developer who made her first botanical craft, a calendula lip balm, with her mom at age 16, before spending six years running her own nature-based arts and literacy subscription box for families and writing for outlets like Willow and Sage Magazine. She creates botanical bath and body recipes rooted in the seasons, believing that crafting with your hands, and what the earth provides, is a direct path to feeling empowered, capable, and beautiful.